|
PARTONS
|
PARtonic Tomography Of Nucleon Software
|
 |
|
PARTONS
|
PARtonic Tomography Of Nucleon Software
|
 |
We recommend that you use VirtualBox as a virtualization software to run PARTONS, see this tutorial. However, the usage of Hyper-V on Windows OS is also possible.
Before any attempt to run PARTONS with Hyper-V make sure that you enable it in Windows, see the official Microsoft tutorial for details.
In order to use PARTONS in Hyper-V the conversion of provided .ova file to a suitable format is necessary.
Download the image of PARTONS virtual machine from this page. This image is in .ova format and it has to be converted into that used by Hyper-V. The .ova file is a tar-archive that can be decompressed into two files: .ovf and .vmdk.
.ovf file describes the properties of the virtual system (vCPUs, Memory, NIC etc.). It is in xml format, so you can launch it with any browser/xml-parser. In our case this file will not be needed..vmdk file is a disk image used by VirtualBox and it has to be converted into a disk image used by Hyper-V (.vhd or .vhdx). VirtualBox provides a convenient tool to make the necessary conversion. Even though you are not going to use VirtualBox later, it is good to install it to make the conversion easy. After installing VirtualBox (see this tutorial for instruction), open the command line tool, go to the directory where the .vmdk file is located and type:Change infile.vmdk into the name of disk image that you have obtained from the extraction of .ova file. You can change outfile.vhd into a more applicable name. If VirtualBox has not been installed in the default place, change c:\Program Files\Oracle\VirtualBox\VBoxManage.exe to the path of your VBoxManage.exe executable. A more detailed instruction about the conversion of VirtualBox files into Hyper-V native files can be found on this website.
Open the Hyper-V Manager. Right-click on your computer name in the left panel of the Hyper-V and choose New -> Virtual Machine .
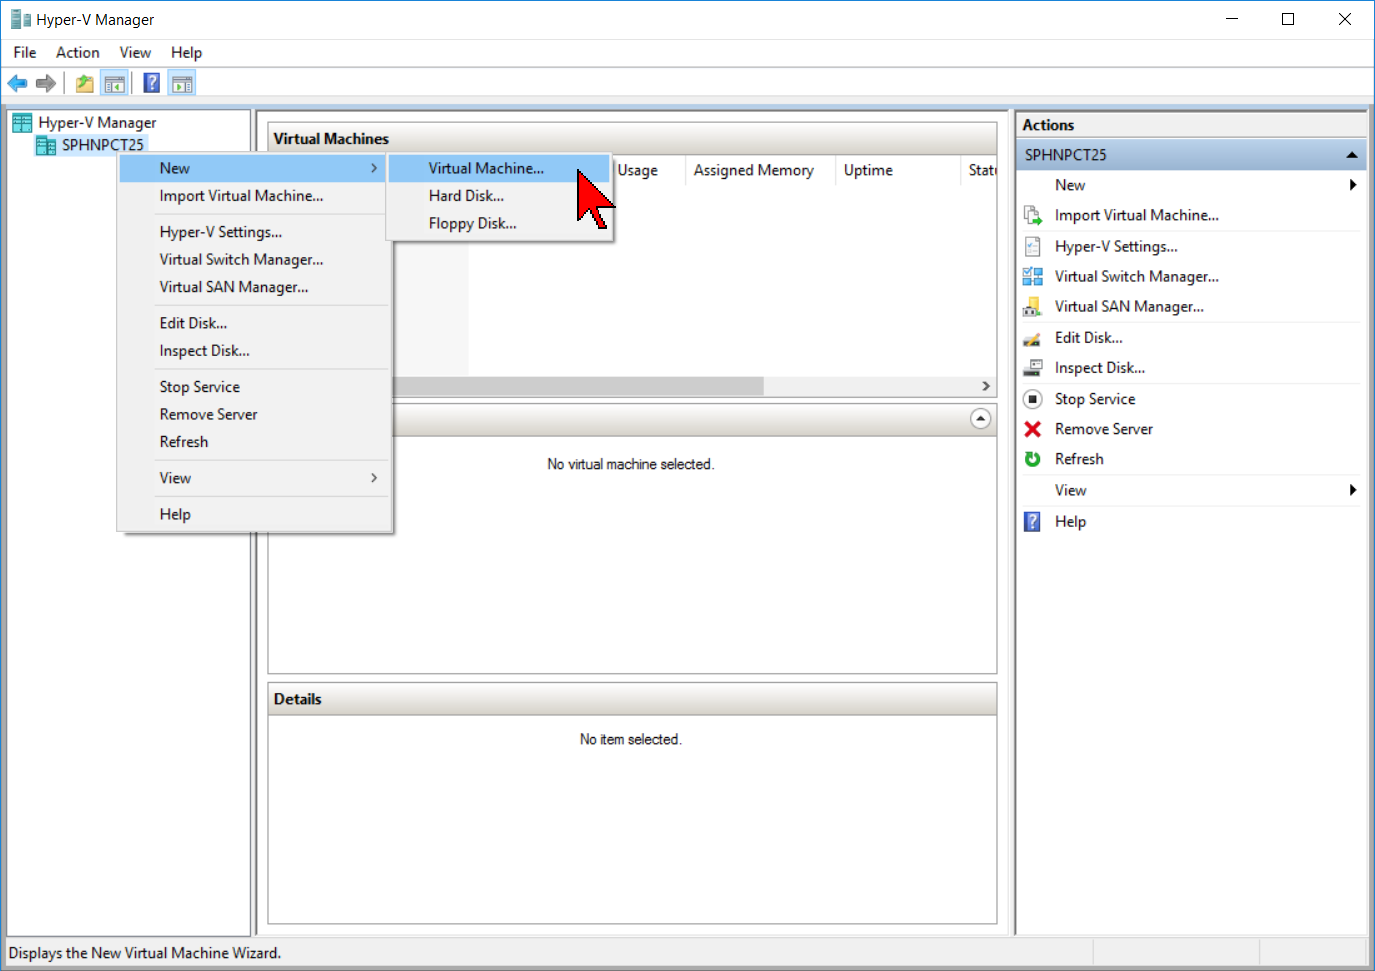
Choose default options in the wizard up to the Connect Virtual Hard Disk tab.
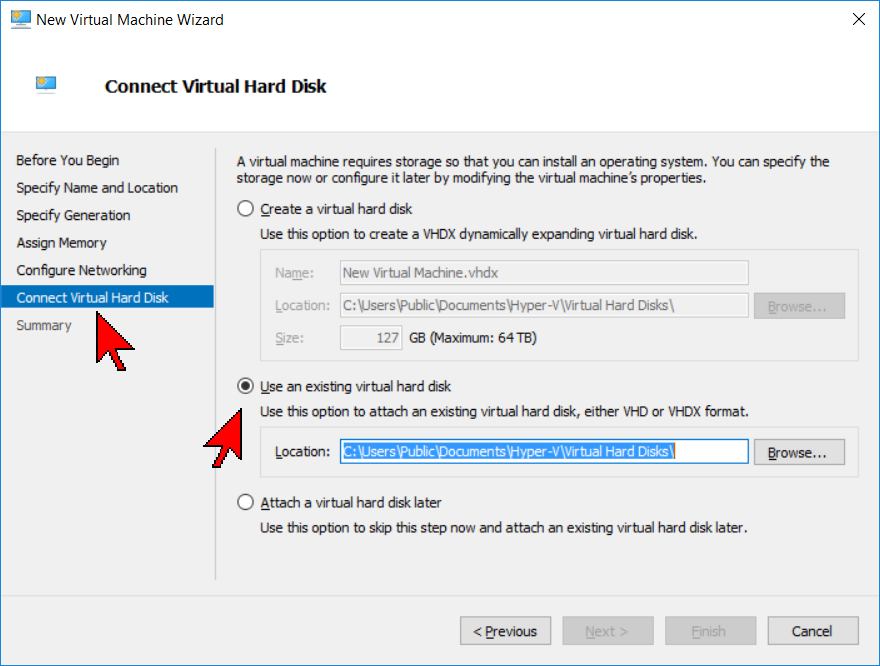
In this tab, select Use an existing virtual hard disk and point the .vhd file that you have created before, then click Finish.
At this moment you should be able to run the PARTONS virtual machine in Hyper-V.
In order to connect the Internet in your VM you have to associate it to the Ethernet/Wireless NIC Card. In order to do so you have to create a Virtual Switch.
Select Action -> Virtual Switch Manager.
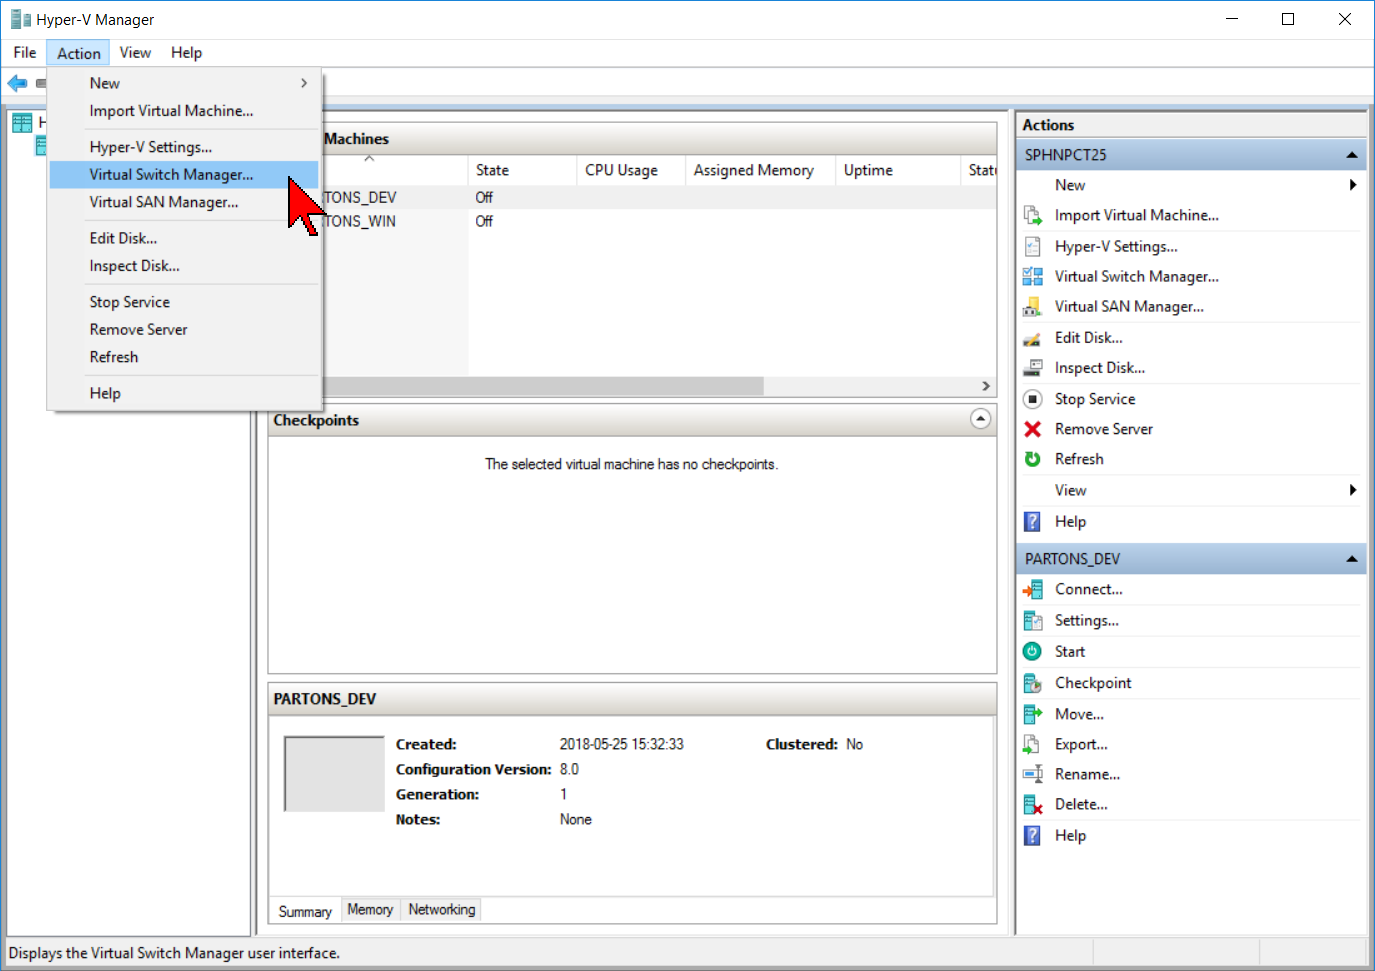
Click on New virtual network switch, then select External and Create Virtual Switch.
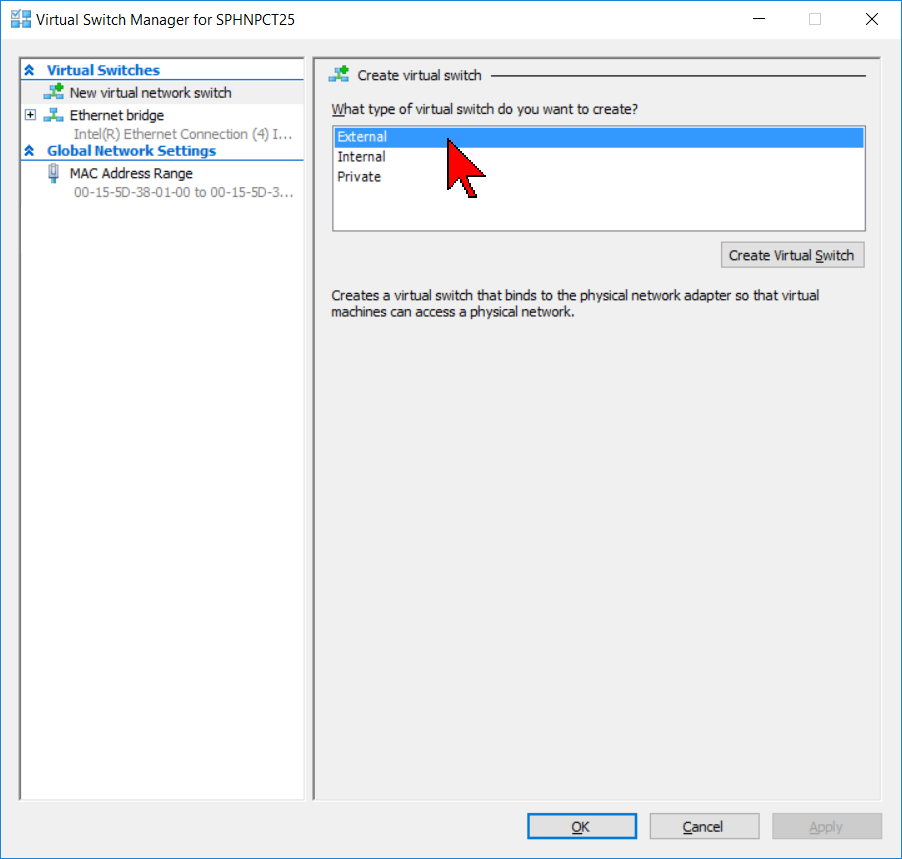
Give the switch a name and then select the External network you use to connect to the Internet (Ethernet, or Wireless, etc,.)
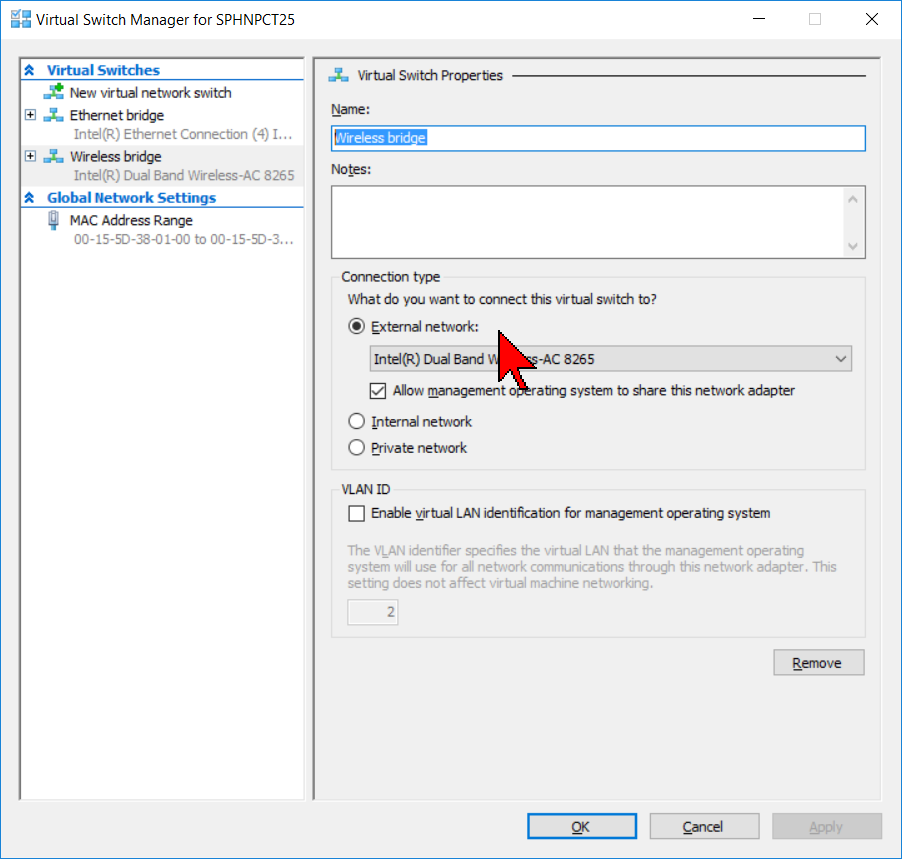
Note: You must select the device that you are actually using to connect to the Internet, i.e. if your computer is set up to use Wifi or Ethernet, but is currently using Wifi, you must use Wifi - the Ethernet connection will not work because the host machine isn't currently using it.
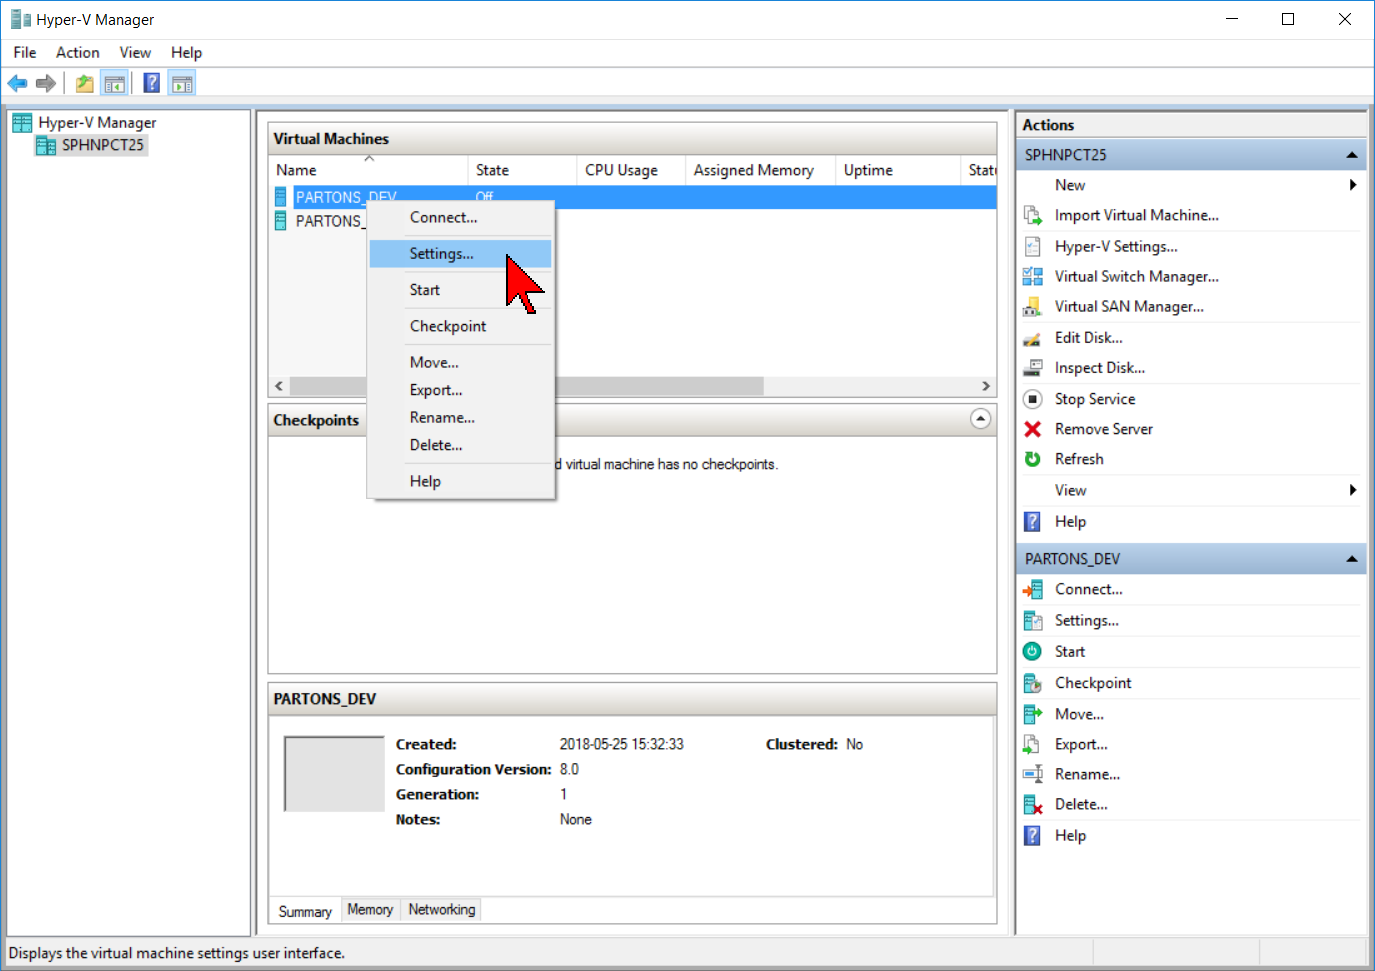
Apply and then OK.Right-click on the Virtual Machine you want to connect and select Settings.
Under the Network Adapter setting select the newly created Virtual Switch
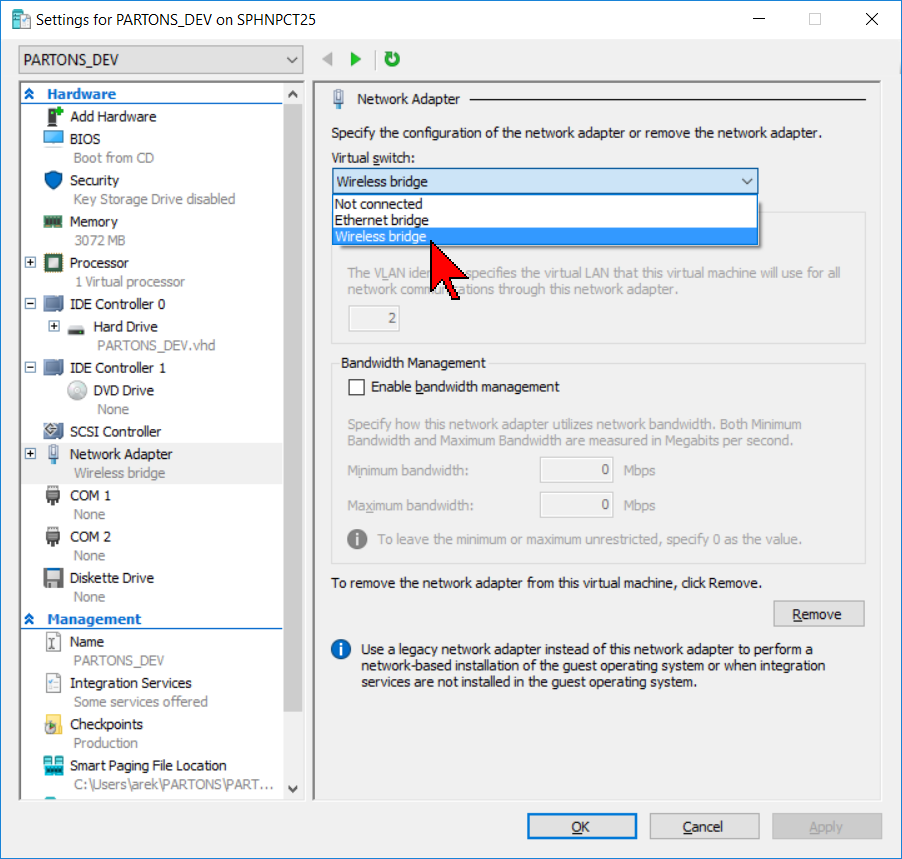
This should enable the Internet connection in your Hyper-V. The above descriptions comes from this tutorial.
If after connecting the virtual switch you still don't have Internet in the virtual machine make sure that following files looks like these:
Any of these files can be edit using command sudo nano path_to_file. After making necessary changes use command
to restart Internet connection.